From zero to your
first MCP server.
You do not need to understand the MCP protocol. Choose the system containing your data, follow its visual instructions, define what the AI may do, then copy one endpoint into your AI client.
Before you begin
Gather the information you will need
Ask your technical administrator for these details
- The database type or a copy of your OpenAPI/Swagger document.
- A read-only service account where possible.
- The server address, database name, username, password, and whether encrypted connections are required.
- The business question your AI should answer—for example, “Find a customer by email.”
What to expect: MCP Forge stores runtime configuration on your infrastructure. Do not use a personal administrator account; use a dedicated account with only the permissions required.
Connect a database
PostgreSQL
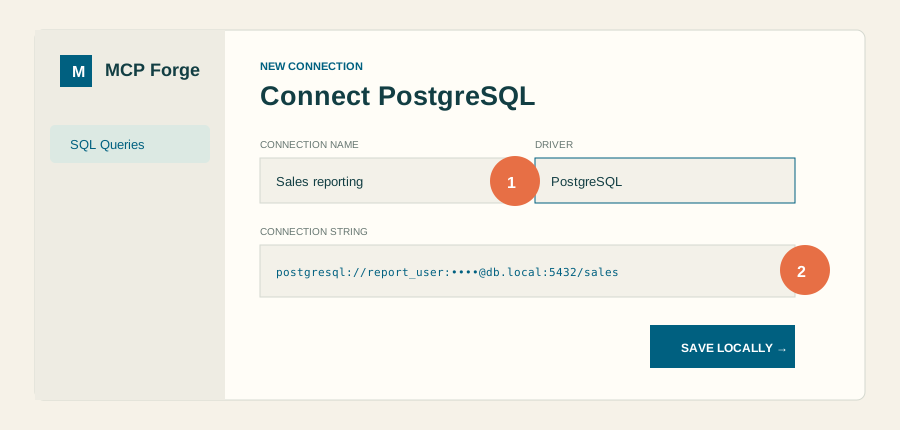
Enter your PostgreSQL connection
- Open MCP Forge and select Runtime → Queries.
- Choose Connection, enter a friendly name, and select PostgreSQL.
- Enter a connection string such as
postgresql://report_user:password@db.company.local:5432/sales. - Save the connection. Your database administrator may need to allow network access from the MCP Forge computer.
What to expect: PostgreSQL queries use $1, $2 placeholders. Results are limited to 1,000 rows by the runtime.
MySQL or MariaDB
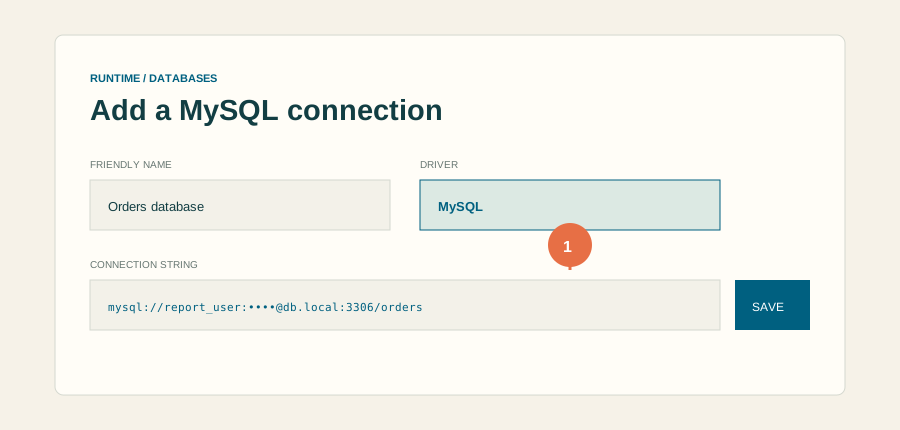
Enter your MySQL connection
- Open Runtime → Queries → Connection.
- Select MySQL and enter a name your team will recognize.
- Enter
mysql://report_user:password@db.company.local:3306/sales. - Save, then create approved queries using
?placeholders.
What to expect: MySQL parameters are supplied in the same order as the parameter list you define.
SQLite
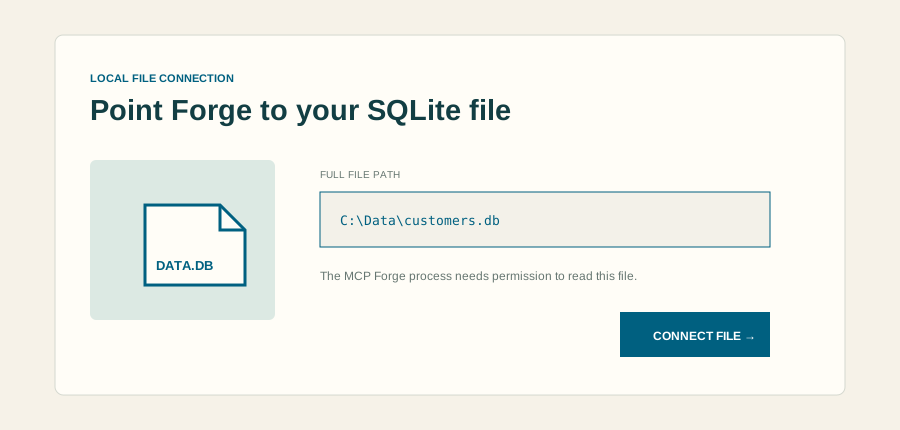
Choose a local database file
- Open Runtime → Queries → Connection.
- Select SQLite.
- Enter the full path to the database file, such as
C:\Data\customers.dbon Windows or/data/customers.dbin Docker. - Ensure the MCP Forge process can read the file.
What to expect: SQLite requires no database server. Docker users must mount the database file into the container.
Microsoft SQL Server
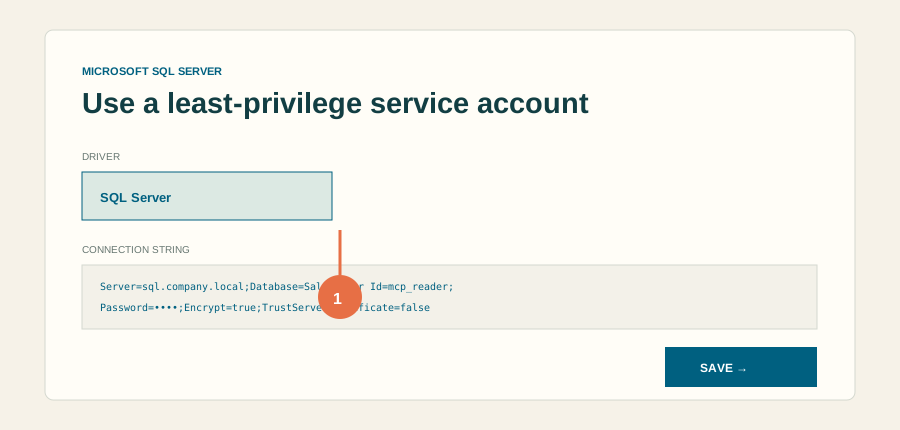
Enter your SQL Server connection
- Open Runtime → Queries → Connection and select SQL Server.
- Enter a connection string such as
Server=sql.company.local;Database=Sales;User Id=mcp_reader;Password=…;Encrypt=true;TrustServerCertificate=false. - Ask your administrator whether SQL authentication is enabled and which encryption settings to use.
- Save the connection. Define query inputs with SQL Server names such as
@email.
What to expect: Each parameter named in MCP Forge is bound to the matching @parameter in your T-SQL query. Use TOP to keep results intentionally small.
Connect an existing API
OpenAPI 3.x or Swagger JSON/YAML
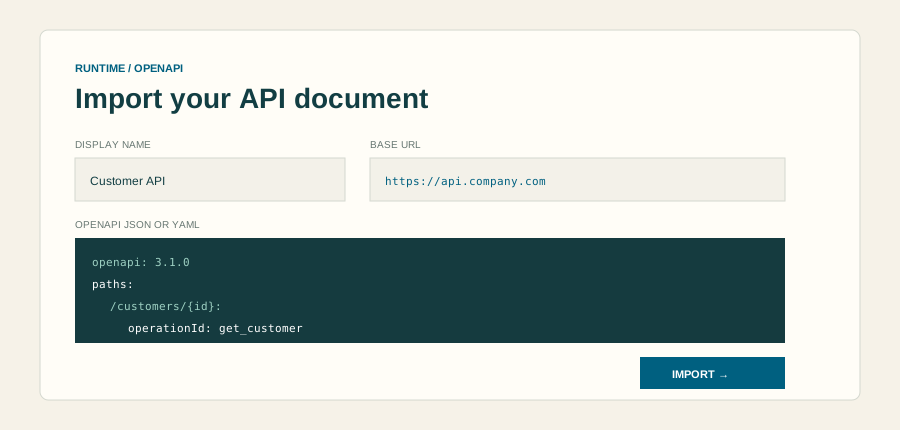
Import the API document
- Open Runtime → API Specs → Import document.
- Give the API a friendly name.
- Enter the base URL if the document does not already include one.
- Paste the complete JSON or YAML document and save.
- Open Runtime → Endpoint and select Test tools/list to confirm the operations were generated.
What to expect: Every supported operation becomes a tool. Its operationId becomes the tool name; descriptions help the AI decide when to use it.
REST API without an OpenAPI document
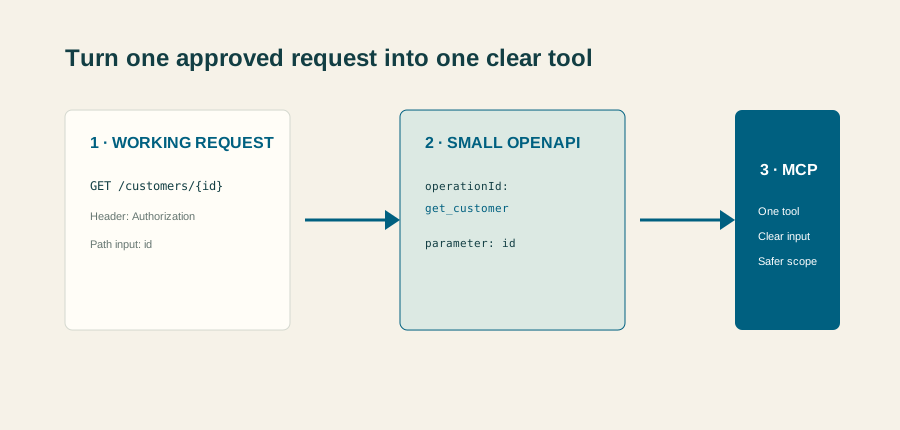
Create a small OpenAPI wrapper
- Collect one working request: method, URL, headers, parameters, and example response.
- Create a minimal OpenAPI document containing only the endpoints you want the AI to call.
- Use clear
operationIdanddescriptionvalues. - Import the wrapper under Runtime → API Specs.
What to expect: MCP Forge intentionally avoids exposing an entire undocumented API automatically. A small approved wrapper creates a safer, clearer tool set.
GraphQL
Use an approved REST/OpenAPI façade
- Choose the GraphQL operations you want to make available.
- Create server-side REST endpoints or an OpenAPI façade that runs those fixed queries and mutations.
- Describe the inputs and outputs in OpenAPI.
- Import that document into MCP Forge.
Current support: Direct arbitrary GraphQL documents are not executed by the current runtime. The approved-façade pattern prevents an AI from composing unrestricted GraphQL operations.
Define an approved query
Create a safe query tool
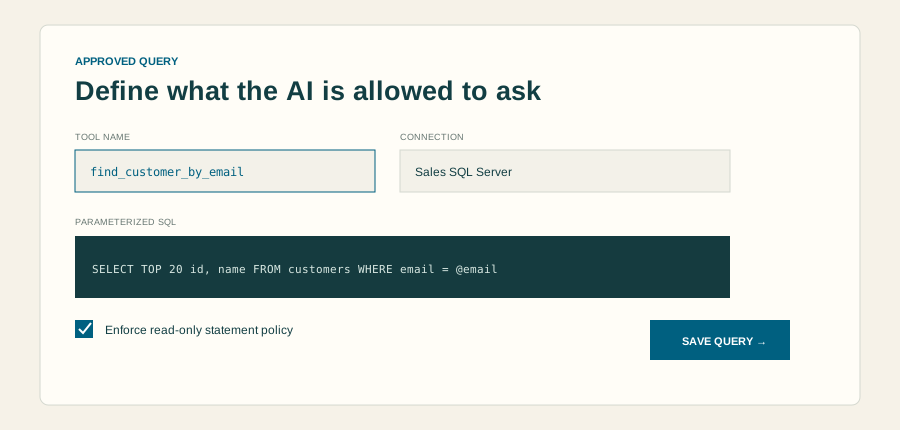
- Open Runtime → Queries → Query.
- Enter a short action-oriented tool name such as
find_customer_by_email. - Select the connection and write a plain-language description.
- Paste the parameterized SQL. Never combine user text directly into SQL.
- Define a JSON parameter array. Names must match the business inputs and, for SQL Server, the
@namesin the query. - Leave read-only enforcement enabled unless the tool must write data.
[
  {"name":"email","type":"string","required":true,
   "description":"Exact customer email address"}
]
What to expect: The tool appears in tools/list immediately. The AI sees its name, description, and parameter schema—not your database password.
Create the MCP endpoint
Publish a local endpoint
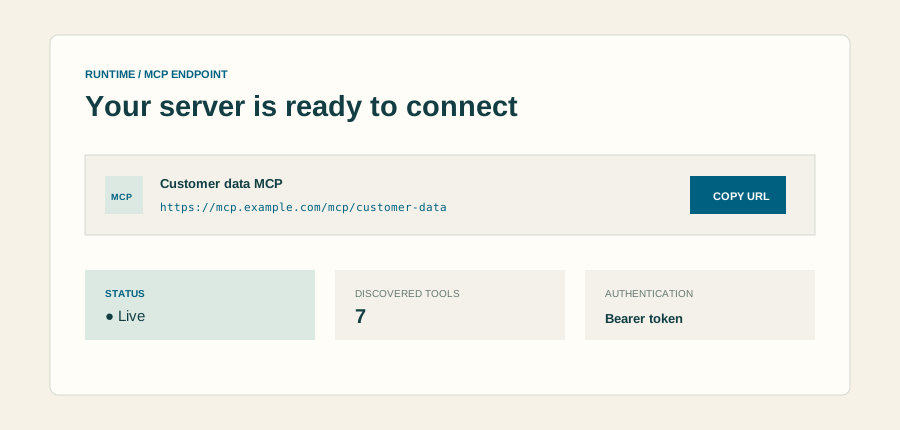
- Set a long random
MCPFORGE_TOKENbefore starting MCP Forge. - Open Runtime → Endpoint.
- Use the default endpoint or create a named endpoint such as
customer-data. - Select Test tools/list. Confirm the expected number of tools.
- Copy the endpoint URL.
What to expect: A local URL looks like http://localhost:4173/mcp/default. For remote use, place MCP Forge behind HTTPS and an authenticated reverse proxy.
Connect an AI client
Add the endpoint to your MCP client
- Open the MCP or connector settings in your chosen AI client.
- Create a server named MCP Forge.
- Paste the endpoint URL.
- Add
Authorization: Bearer YOUR_TOKENas a request header. - Connect and review the tools the client discovers.
{
  "mcpServers": {
    "mcp-forge": {
      "url": "https://mcp.example.com/mcp/default",
      "headers": {"Authorization":"Bearer YOUR_TOKEN"}
    }
  }
}Troubleshooting
The database connection fails
Check the hostname, port, credentials, encryption settings, firewall, and database permissions. From Docker, localhost refers to the container—not the host computer.
The tool does not appear
Confirm the query saved successfully or the OpenAPI operation has a supported HTTP method. Then call tools/list again or reconnect the client.
The query is rejected as read-only
Read-only tools must begin with SELECT, WITH, EXPLAIN, or PRAGMA. For an intentional write, disable read-only only after reviewing permissions and adding an approval workflow.
I need personal help
Email support@builtbykris.com with the connection type and the error message. Never email passwords, tokens, or full connection strings.